Sidebar
User Statistics
- Total Users: 1,134
- Latest User: evilmoster
- Online Users: 0
- Users Today: 0
- Users this Week: 0
- Users this Month: 0
- Users this Year: 0
Who's Online
We have 101 guests and no members online
Downloads Stats

Blog (10)
Here you can read about it all, so stay tuned!
Children categories

News & Update (1)
In this category you can read about my last creations, and get the latest updates!

Tips & Tutorials (9)
In this category you can get tips and tricks from me, on how to make custom, windows 7 themeing, a bit more easy!
Hey guy's, so i have finally finished the AIMP3 skin for my upcoming Alienware HQ Theme Series for Windows 7 and 8
I you are following me over at my facebook page, i bet you have seen the design process of the skin, and i have spent a good 10-15 hours in total on this skin i think, and i enjoyed every second of it.
The reason i made this skin is because i posted a status over at facebook, asking if you guy's had some wishes of extras for the upcoming theme pack, AIMP3 came up, and i have only made one other AIMP3 skin so it was time to finally get deep into the AIMP skinner and make another Skin.

Today i am going to show you a pretty neat trick, that are hidden in Windows 7. Windows 7 offers you location specific Aero themes based on the language and location you pick during installation. In this tutorial i will show you how to accessing other hidden themes from different countries. When you first start the Windows 7 installation the first thing you will do is select a language, time and currency format. This is where Windows determines what themes you’re presented with by default.
Being from Norway i am not presented with the same themes as for example United States of America (USA) are presented with, this is because of location specific themes from the United States with desktop backgrounds such as scenery from Maine, Idaho, Oregon etc.
Have you been wondering how you can change thedefault background and how to add a custom background.
Have you been wondering how you can change thedefault background and how to add a custom background.
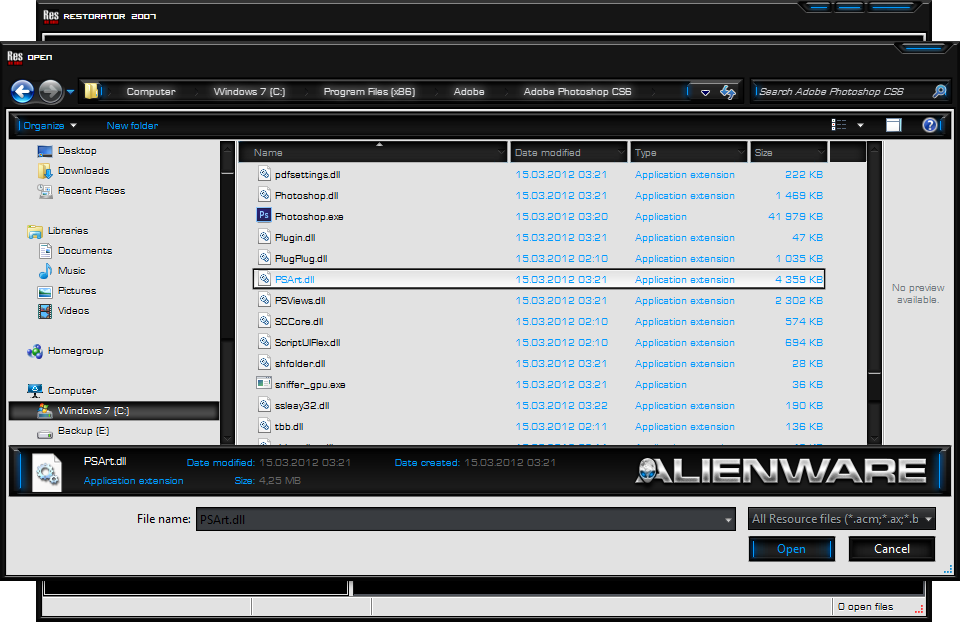
Dont you worry this tutorial will show you how to change the default background and how to add a custom background in Windows Media Player that is shown in Library mode. All you need is a program called Restorator to do this modification/hack.
You can download a free 30-day trial, or you can do as i did and buy it, and supporting the company for further development.
This tutorial has been tested in Windows 7 but it should also work in Windows Vista and Windows 8.
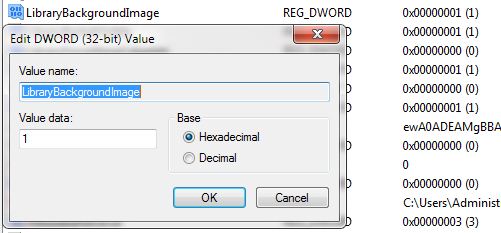
So without wasting time, lets start the tutorial: 1. The system file which contains System Properties UI resources in Windows 7 is "systemcpl.dll" present in "%windir%\System32\" folder. Here %windir% represents "Windows" directory which can be found in the system drive where Windows is installed. In most of the cases its C:\Windows. First copy systemcpl.dll file from "System32" folder to some other location for example Desktop.
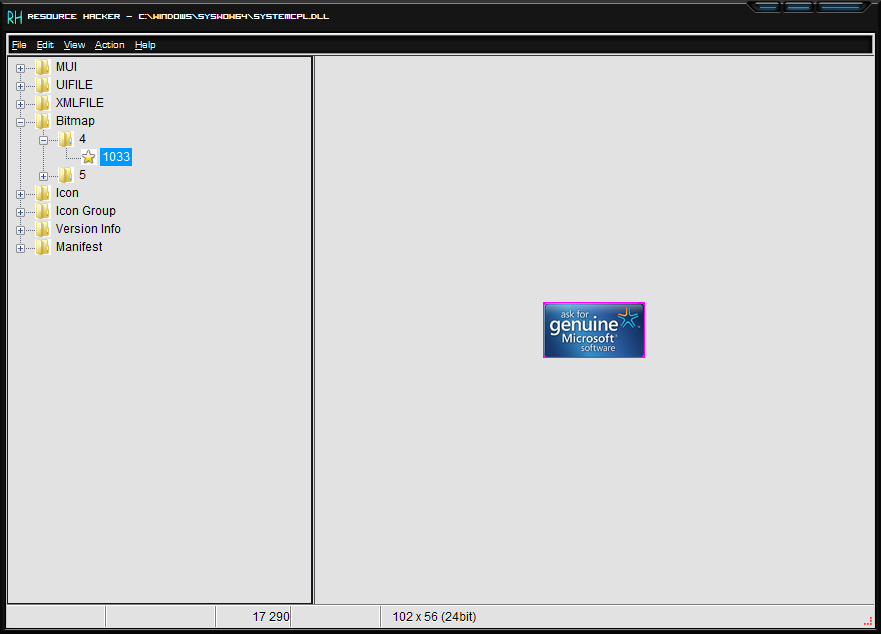
2. Now open the new file in Resource Hacker and go to following key: Bitamp -> 4 -> 1033
3. In right-side pane, you'll get a preview of the image that is applyed in the .dll file
4. When you finish editing/modifying the file, click on save
5. Now we'll need to replace original systemcpl.dll file present in "C:\Windows\System32\" folder with our new systemcpl.dll file which we saved at Desktop or some other location.
6 a. First take ownership of "C:\Windows\System32\systemcpl.dll" file using following tutorial: How to add “Take Ownership”
6 b. Now rename it to "systemcpl_backup.dll" or any other name of your choosing.
How to Add “Take Ownership” Option in Files and Folders Context Menu in Windows
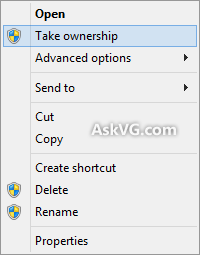
Many times you need to take ownership of a file or folder in Windows. For example, when you want to customize Windows UI and need to replace existing system files with a new one. You have to follow no. of steps to take ownership and grant yourself full permission to access the file or folder.
But now you can do it in a single step. You just need to download following zip file and extract it. You'll get a .REG file. Run the file and accept the confirmation. It will add an extra option "Take ownership" in file and folder context menu like in the image you can se on the right.
Now you can right-click on any file or folder and select "Take ownership" option. It'll make you the owner of the file or folder and you can perform your desired operation on that file or folder. An extra uninstallation registry script is also available in the ZIP file in case you want to remove the option from context menu. PS: If you want to know what kind of command does the context menu option "Take Ownership" execute when you click on it, here is some interesting information for you: We have assigned 2 commands to the context menu option, so whenever you click on "Take Ownership" option from context menu, it executes those 2 commands to take ownership of the file/folder and assign full control to you. Following are the 2 commands which are run by the context menu option: